Create New Spread
Create New Spread is a tool that lets you create and edit XML files through a graphical user interface without having to know anything about XML.
To Create a New Spread:
- Press the F5 function key; or
From the Orphalese Desktop, click on the grid to display the Orphalese Menu, click My Spreads >> Create New Spread.
The Create New Spread Window will be displayed:
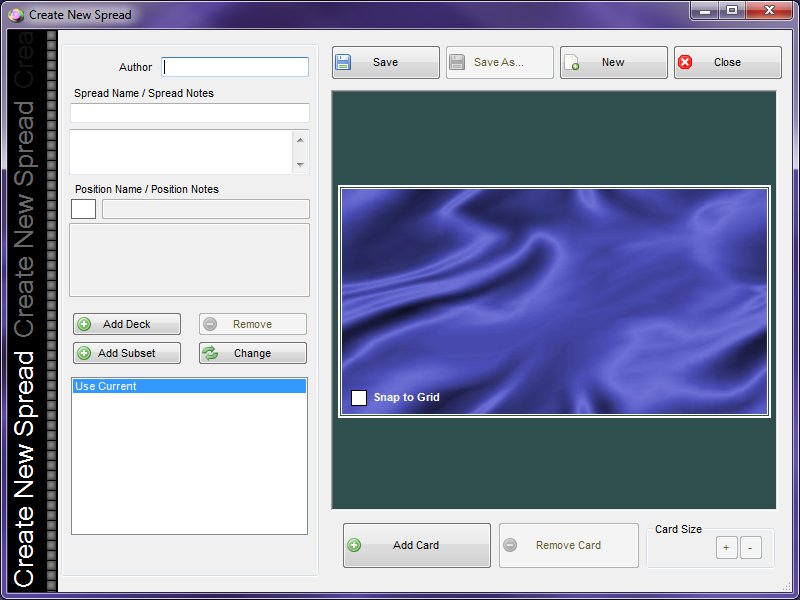 Create New Spread
- Enter the Author's Name.
![]() Create New Spread - Author
Create New Spread - Author
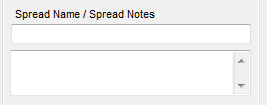 Create New Spread - Spread Name
Note: When selecting a Spread from the My Spreads list, the Spread description is displayed in a Pop-Up Note when you hover the mouse over the Deck.
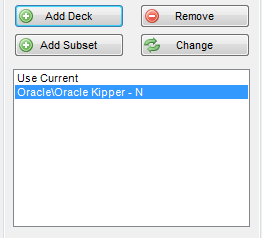
- Click the Add Deck or Add Subset button to select a Deck.
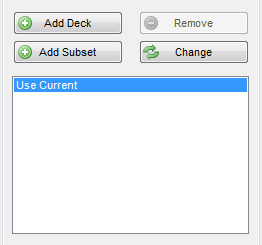 Create New Spread Add Deck button
Note: Spreads can be created using specific Decks and/or Subsets so that the associated Deck/Subset is automatically opened when the Spread is launched from the My Spreads Menu.
Use Current Deck is selected by default. Creating a Spread with Use Current Deck uses the Deck currently being used (rather than an associated Deck/Subset) when the Spread is launched from the My Spreads Menu.
A screen similar to the following will be displayed: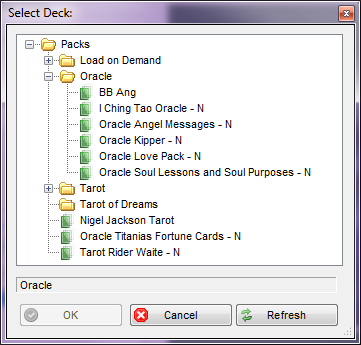 Create New Spread - Select Deck
- Select a Deck(s) and click the OK button.
Associated Decks/Subsets are displayed in the bottom pane:
 Create New Spread - Selected Decks
- Click on the Deck/Subset then click the Add Card button to display a Card.
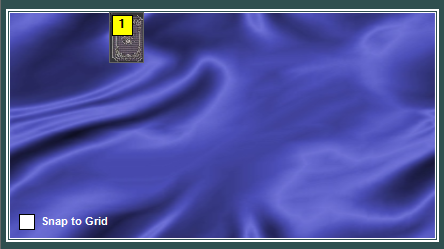 Create New Spread Card 1
- An image representing Card Position 1 is displayed on the Background. The number on the Card represents the order in which the Card will be dealt.
- Move the Card (drag and drop) to the required position.
Note: Using the Snap to Grid option assists to place the Cards on the Background with more precision. - Click on the Card, then enter a Position Name and Note (Description).
- Note: The Position Name and Note (Description) is displayed in a Pop-Up Note when you hover the mouse over the Card in that position.
 Create New Spread - Card 1
Optional:
- Increase or decrease the position Card Size by clicking the + or - buttons.
- Click on a Card, and click the Remove Card button to remove it from the Background. Clicking on the Remove Card button without selecting a Card first will remove the last added Card.
- Repeats steps 6 to 8 until all Cards have been positioned on the Background and annotated.
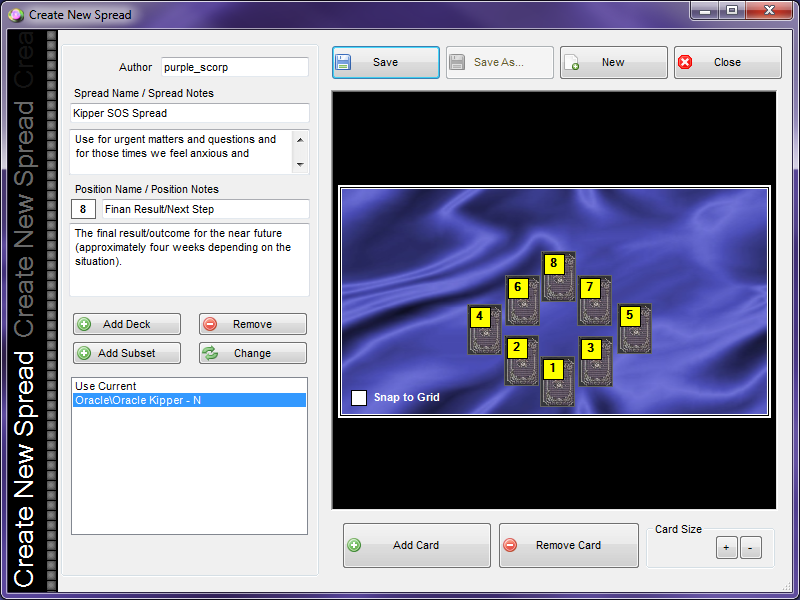 Create New Spread - Final
- Click the Save button when the Spread Creation is completed.
The Save As window is displayed with the Spread Name you entered when creating the Spread.
Note: The Spread Name is also the .XML File Name which must conform to standard Windows naming conventions. If you type inadmissible characters the following message will be displayed:
 Spreads Wizard File Name
- Click the Save button to save the Spread and return to the Create New Spread window.
- Click the New button to create another Spread; or
Click the Close button to return to the Desktop.
The Spread is now included in the My Spreads list:
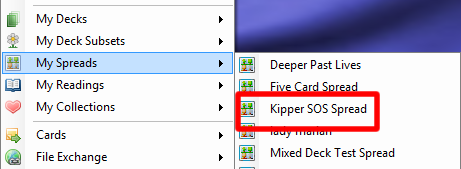 My Spreads
To Edit a Spread:
- From the My Spreads Menu, click Edit Spread.
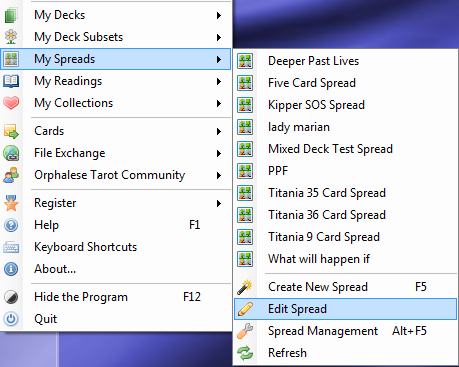 My Spreads - Edit Spread
The Select Spread window will be displayed:
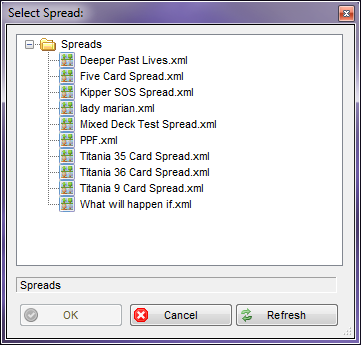 Edit Spread - Select
- Recently created Spreads may not immediately appear on the list. Click the Refresh button to display the most recent list.
- Spreads are listed in ascending alphabetical order. Click on a Spread to select it, then click the OK button.
A screen similar to the following will be displayed:
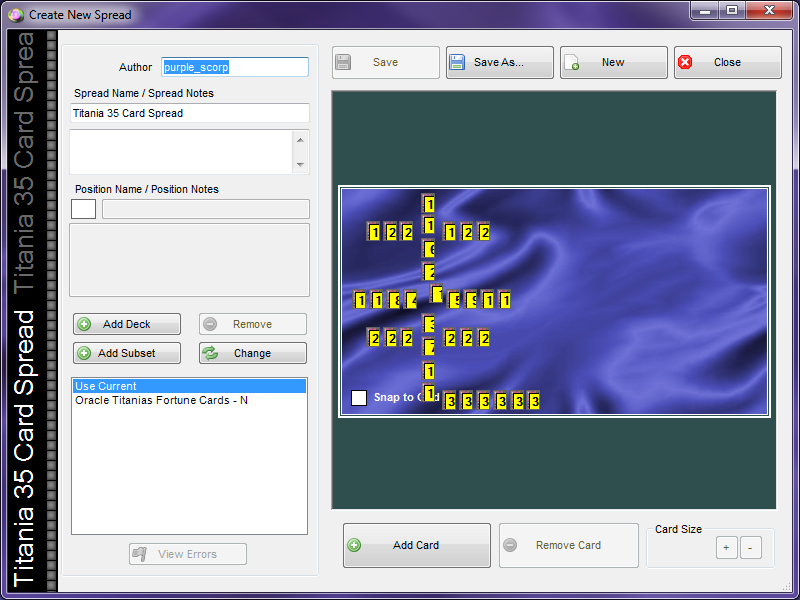 Spread Edit
- Make any changes and when completed, click the Save button.
- Click the Close button to return to the Desktop.